Mastering Kubernetes Network Policy for Enhanced Security
Learn how Kubernetes Network Policy enhances security by controlling pod communication, reducing vulnerabilities, and ensuring compliance in your cluster.
Table of Contents
Running applications on Kubernetes without network policies is like leaving your front door open. Kubernetes, by default, allows all network traffic, making your pods vulnerable to unauthorized access. This is where Kubernetes Network Policies come in. They act as gatekeepers, controlling the flow of traffic within your cluster. By defining precise rules about which pods can communicate, you significantly reduce your security risks and isolate your applications.
This post will cover everything you need to know about Kubernetes Network Policies, from basic concepts to advanced configurations and troubleshooting techniques. By the end of this post, you'll be empowered to lock down your cluster and protect your valuable data.
Enforce compliance with centralized policy management
Protect sensitive data while meeting regulatory demands.
Key Takeaways
- Control pod communication with Network Policies: Shift from Kubernetes default open networking to a zero-trust model by defining explicit allow-list rules for pod traffic. This limits the impact of security breaches and ensures only authorized communication.
- Use selectors and rules effectively: Use labels, namespace selectors, and IP block selectors to target specific pods, namespaces, or IP blocks with granular control. Combine multiple rules for layered policies, but be mindful of potential performance implications.
- Test and validate for robust security: Start with a deny-all policy in a staging environment and incrementally add allow rules. Use kubectl to test and validate network policies. To manage network policies at an enterprise scale, employ a centralized policy management solution such as Plural.
What are Kubernetes Network Policies?
Definition and Purpose
Network Policies are Kubernetes objects that govern traffic flow, enabling you to specify allowed connections for both incoming (ingress) and outgoing (egress) traffic. They act as firewalls for your pods, defining rules that specify permitted communication paths between pods and with external networks.
By default, Kubernetes networking is open. Without Network Policies, all pods can communicate freely with each other and external networks. This unrestricted communication poses security risks as it doesn't inherently isolate applications. This default behavior changes dramatically when you apply even one Network Policy to a pod. The model shifts to default-deny, blocking all traffic unless explicitly allowed by a policy.
How Kubernetes Network Policies Work
Traffic Control Mechanisms
Kubernetes Network Policies act at the IP address and port level (layers 3 and 4 of the network model), managing TCP, UDP, and SCTP protocols. By default, Kubernetes allows all network traffic. Introducing Network Policies shifts this to "default-deny." This means all traffic is blocked unless explicitly permitted, a fundamental security principle. Policies are additive: if multiple policies apply to a pod, the allowed connections are the combined allowances of all applicable policies. For a connection to be permitted, both the egress (outgoing) policy on the source pod and the ingress (incoming) policy on the destination pod must allow it. This ensures strict bidirectional control.
Pod Selection and Labeling
Network Policies use selectors, primarily labels, to target specific pods or namespaces. They can also target IP blocks (CIDR ranges), providing flexibility in defining policy scope. The podSelector field specifies which pods the policy applies to. Selectors can be granular: podSelector targets pods based on labels, while namespaceSelector targets pods within specific namespaces based on labels. This allows precise control over traffic flow, isolating workloads, and enforcing security boundaries. Using labels effectively is key to managing Network Policies, especially in larger clusters.
Define and Implement Kubernetes Network Policies
By specifying how pods are allowed to communicate, you can limit the impact of security breaches and ensure that only authorized traffic flows between your services.
Kubernetes Network Policy YAML Structure
Like other Kubernetes resources, Network Policies are defined using YAML files. A standard structure includes the apiVersion, kind, and metadata sections. The spec section houses the policy's rules, including the podSelector to specify the target pods and policyTypes to define whether the policy applies to ingress, egress, or both. Within the ingress and egress blocks, you define the rules for inbound and outbound traffic.
Create Your First Policy
Creating a Network Policy is straightforward. You can define your policy in a YAML file and apply it using the kubectl apply -f <filename>.yaml command. A simple policy might allow ingress traffic only from pods with a specific label. A common best practice is to start with a "deny-all" policy, effectively locking down your namespace. Then, incrementally add allow rules for specific traffic flows. This approach ensures a secure baseline and minimizes the risk of unintended exposure.
apiVersion: networking.k8s.io/v1
kind: NetworkPolicy
metadata:
  name: example-network-policy
  namespace: default
spec:
  podSelector:
    matchLabels:
      app: web-server
  policyTypes:
    - Ingress
    - Egress
  ingress:
    - from:
        - podSelector:
            matchLabels:
              role: frontend
      ports:
        - protocol: TCP
          port: 80
  egress:
    - to:
        - podSelector:
            matchLabels:
              role: database
      ports:
        - protocol: TCP
          port: 5432
Network Policy Selectors and Rules
Understanding selectors and rules is crucial for crafting effective network policies.
Pod Selectors
The most common selector is the podSelector, which targets pods within a namespace based on their labels. Think of labels as tags you assign to your pods, allowing you to group them logically. For example, if you have a set of pods labeled app: web-frontend, your network policy can use this label to target these pods specifically. This granular control enables you to isolate different application tiers or services within your cluster.
apiVersion: networking.k8s.io/v1
kind: NetworkPolicy
metadata:
  name: web-frontend-policy
  namespace: default
spec:
  podSelector:
    matchLabels:
      app: web-frontend
  policyTypes:
    - Ingress
  ingress:
    - from:
        - podSelector:
            matchLabels:
              app: api-backend
      ports:
        - protocol: TCP
          port: 80
Namespace Selectors
In addition to selecting pods, you can also target entire namespaces using namespaceSelector. This is useful when applying a policy to all pods within a specific namespace or to a group of namespaces sharing a common label. For instance, you might have a namespaceSelector that targets all namespaces labeled environment: production to enforce stricter network controls in your production environment.
apiVersion: networking.k8s.io/v1
kind: NetworkPolicy
metadata:
  name: production-policy
  namespace: default
spec:
  podSelector:
    matchLabels:
      app: web-server
  policyTypes:
    - Ingress
  ingress:
    - from:
        - namespaceSelector:
            matchLabels:
              environment: production
      ports:
        - protocol: TCP
          port: 80
IP Block Selectors
ipBlock selectors allow you to define allowed or denied traffic based on IP address ranges. This is particularly helpful for controlling access from external networks or specific IP addresses. You can use CIDR notation to specify IP ranges, enabling you to manage access for entire subnets or individual hosts easily. For example, you could use an ipBlock to allow traffic from your company's VPN IP range while blocking all other external traffic.
apiVersion: networking.k8s.io/v1
kind: NetworkPolicy
metadata:
  name: allow-vpn-access
  namespace: default
spec:
  podSelector: {}
  policyTypes:
    - Ingress
  ingress:
    - from:
        - ipBlock:
            cidr: 203.0.113.0/24  # Replace with your company's VPN range
      ports:
        - protocol: TCP
          port: 443
Combine Multiple Rules
Network policies are additive. This means that if multiple policies apply to a pod, the combined effect is the union of all allowed connections. For a connection to be allowed, both the source pod's egress policy and the destination pod's ingress policy must permit it. This additive nature will enable you to create layered policies, starting with a baseline and adding more specific rules as needed.
Advanced Network Policy Configurations
Once you’re comfortable with basic NetworkPolicy configurations, you can implement more complex scenarios for fine-grained traffic control.
Using except Clauses
The except clause within a NetworkPolicy provides granular control over exceptions to your defined rules. This is particularly useful when you have a broad allow rule but need to block specific IP addresses or ports. For example, you might want to allow all traffic to a set of pods except for traffic originating from a known malicious IP address. The except clause works for IP blocks and port ranges, offering flexibility in defining exceptions.
apiVersion: networking.k8s.io/v1
kind: NetworkPolicy
metadata:
  name: allow-all-except-malicious
  namespace: my-namespace
spec:
  podSelector: {}
  ingress:
    - from:
        - ipBlock:
            cidr: 0.0.0.0/0
            except:
              - 192.168.1.100/32  # Block traffic from this IP
Control Inter-Namespace Communication
NetworkPolicies can manage traffic not only within a namespace but also across namespaces. This is crucial for microservice architectures where communication between services in different namespaces is common. You can use namespaceSelector to define which namespaces are allowed to communicate with pods in the current namespace. For instance, you might have a frontend namespace and a backend namespace. A NetworkPolicy in the backend namespace can specify that only pods in the frontend namespace can access it. This isolates the backend from other namespaces, enhancing security.
apiVersion: networking.k8s.io/v1
kind: NetworkPolicy
metadata:
  name: allow-frontend
  namespace: backend
spec:
  podSelector: {}
  ingress:
    - from:
        - namespaceSelector:
            matchLabels:
              name: frontend
  policyTypes:
    - Ingress
Deny-all and Allow-list Approaches
A deny-all, allow-list approach is the most secure strategy for critical workloads. This involves starting with a NetworkPolicy that denies all traffic to and from the selected pods. Then, you explicitly create rules that allow only the necessary communication paths. This minimizes the attack surface by defaulting to a restrictive posture. While this approach requires careful planning and management, it significantly reduces the risk of unauthorized access.
Troubleshoot and Test Network Policies
The complexity of Kubernetes network policies can result in misconfigurations and unexpected behavior. Effectively troubleshooting these issues requires a systematic approach and the right tools.
Common Issues and Solutions
Network policies introduce a layer of abstraction on top of existing Kubernetes networking. This can make pinpointing the root cause of connectivity problems challenging. Some common issues include:
- Incorrect selectors: If your pod selectors are too broad or too narrow, the policy may not apply to the intended pods. Double-check your labels and selectors to ensure they align. A common mistake is using labels meant for service discovery in network policies.
- Conflicting policies: Multiple network policies can interact in unexpected ways. If you have overlapping policies, the most restrictive one takes precedence. Review all policies applied to the affected pods and namespaces to identify conflicts. Consider using a visualization tool for your policies.
- Namespace limitations: Network policies operate within a namespace. You'll need to create policies in each relevant namespace to control traffic between namespaces. Ensure your policies account for communication across namespace boundaries.
- Missing default deny: Without a default deny-all policy, traffic not explicitly allowed by a policy is implicitly allowed. This can create security vulnerabilities. Always start with a deny-all policy and create allow-list rules for specific traffic.
Debugging Tools and Techniques
Several tools can help you visualize and debug network policies:
kubectl describe networkpolicy: This command provides detailed information about a specific network policy, including its selectors, rules, and applied pods. Use this to verify that the policy is configured as expected. For morekubectlcommands, see the documentation.kubectl logs: Examine the logs of your pods to identify connection failures or other network-related errors. This can provide clues about which policies might be blocking traffic.- Knetvis: This CLI tool visualizes your network policies, making it easier to understand their combined effect. It can also test connectivity between pods and services, helping you identify potential issues before they impact production.
Test Before Deploying
Testing your network policies before deploying them to production is crucial. A robust testing strategy should include:
- Dry-run deployments: Use
kubectl apply --dry-run=clientto validate your network policy YAML without actually applying it to the cluster. This helps catch syntax errors and other configuration issues early on. Tools like Cilium Network Policy Editor can automatically create test cases for your network policies. - Staged rollouts: Deploy your network policies to a staging environment that mirrors your production environment. This allows you to test their impact on real-world traffic without affecting your live applications.
- Default deny-all policy: Implement a default deny-all policy in your staging environment. This ensures that only explicitly allowed traffic is permitted, allowing you to fine-tune your policies before applying them to production. This practice helps avoid accidentally exposing services.
Manage Kubernetes Network Policies at Scale
Managing network policies at scale is a critical challenge for organizations deploying Kubernetes clusters, especially as these environments grow in complexity. However, manually managing these policies across large or multi-tenant clusters can quickly become overwhelming, leading to errors and inefficiencies.
Centralized policy management
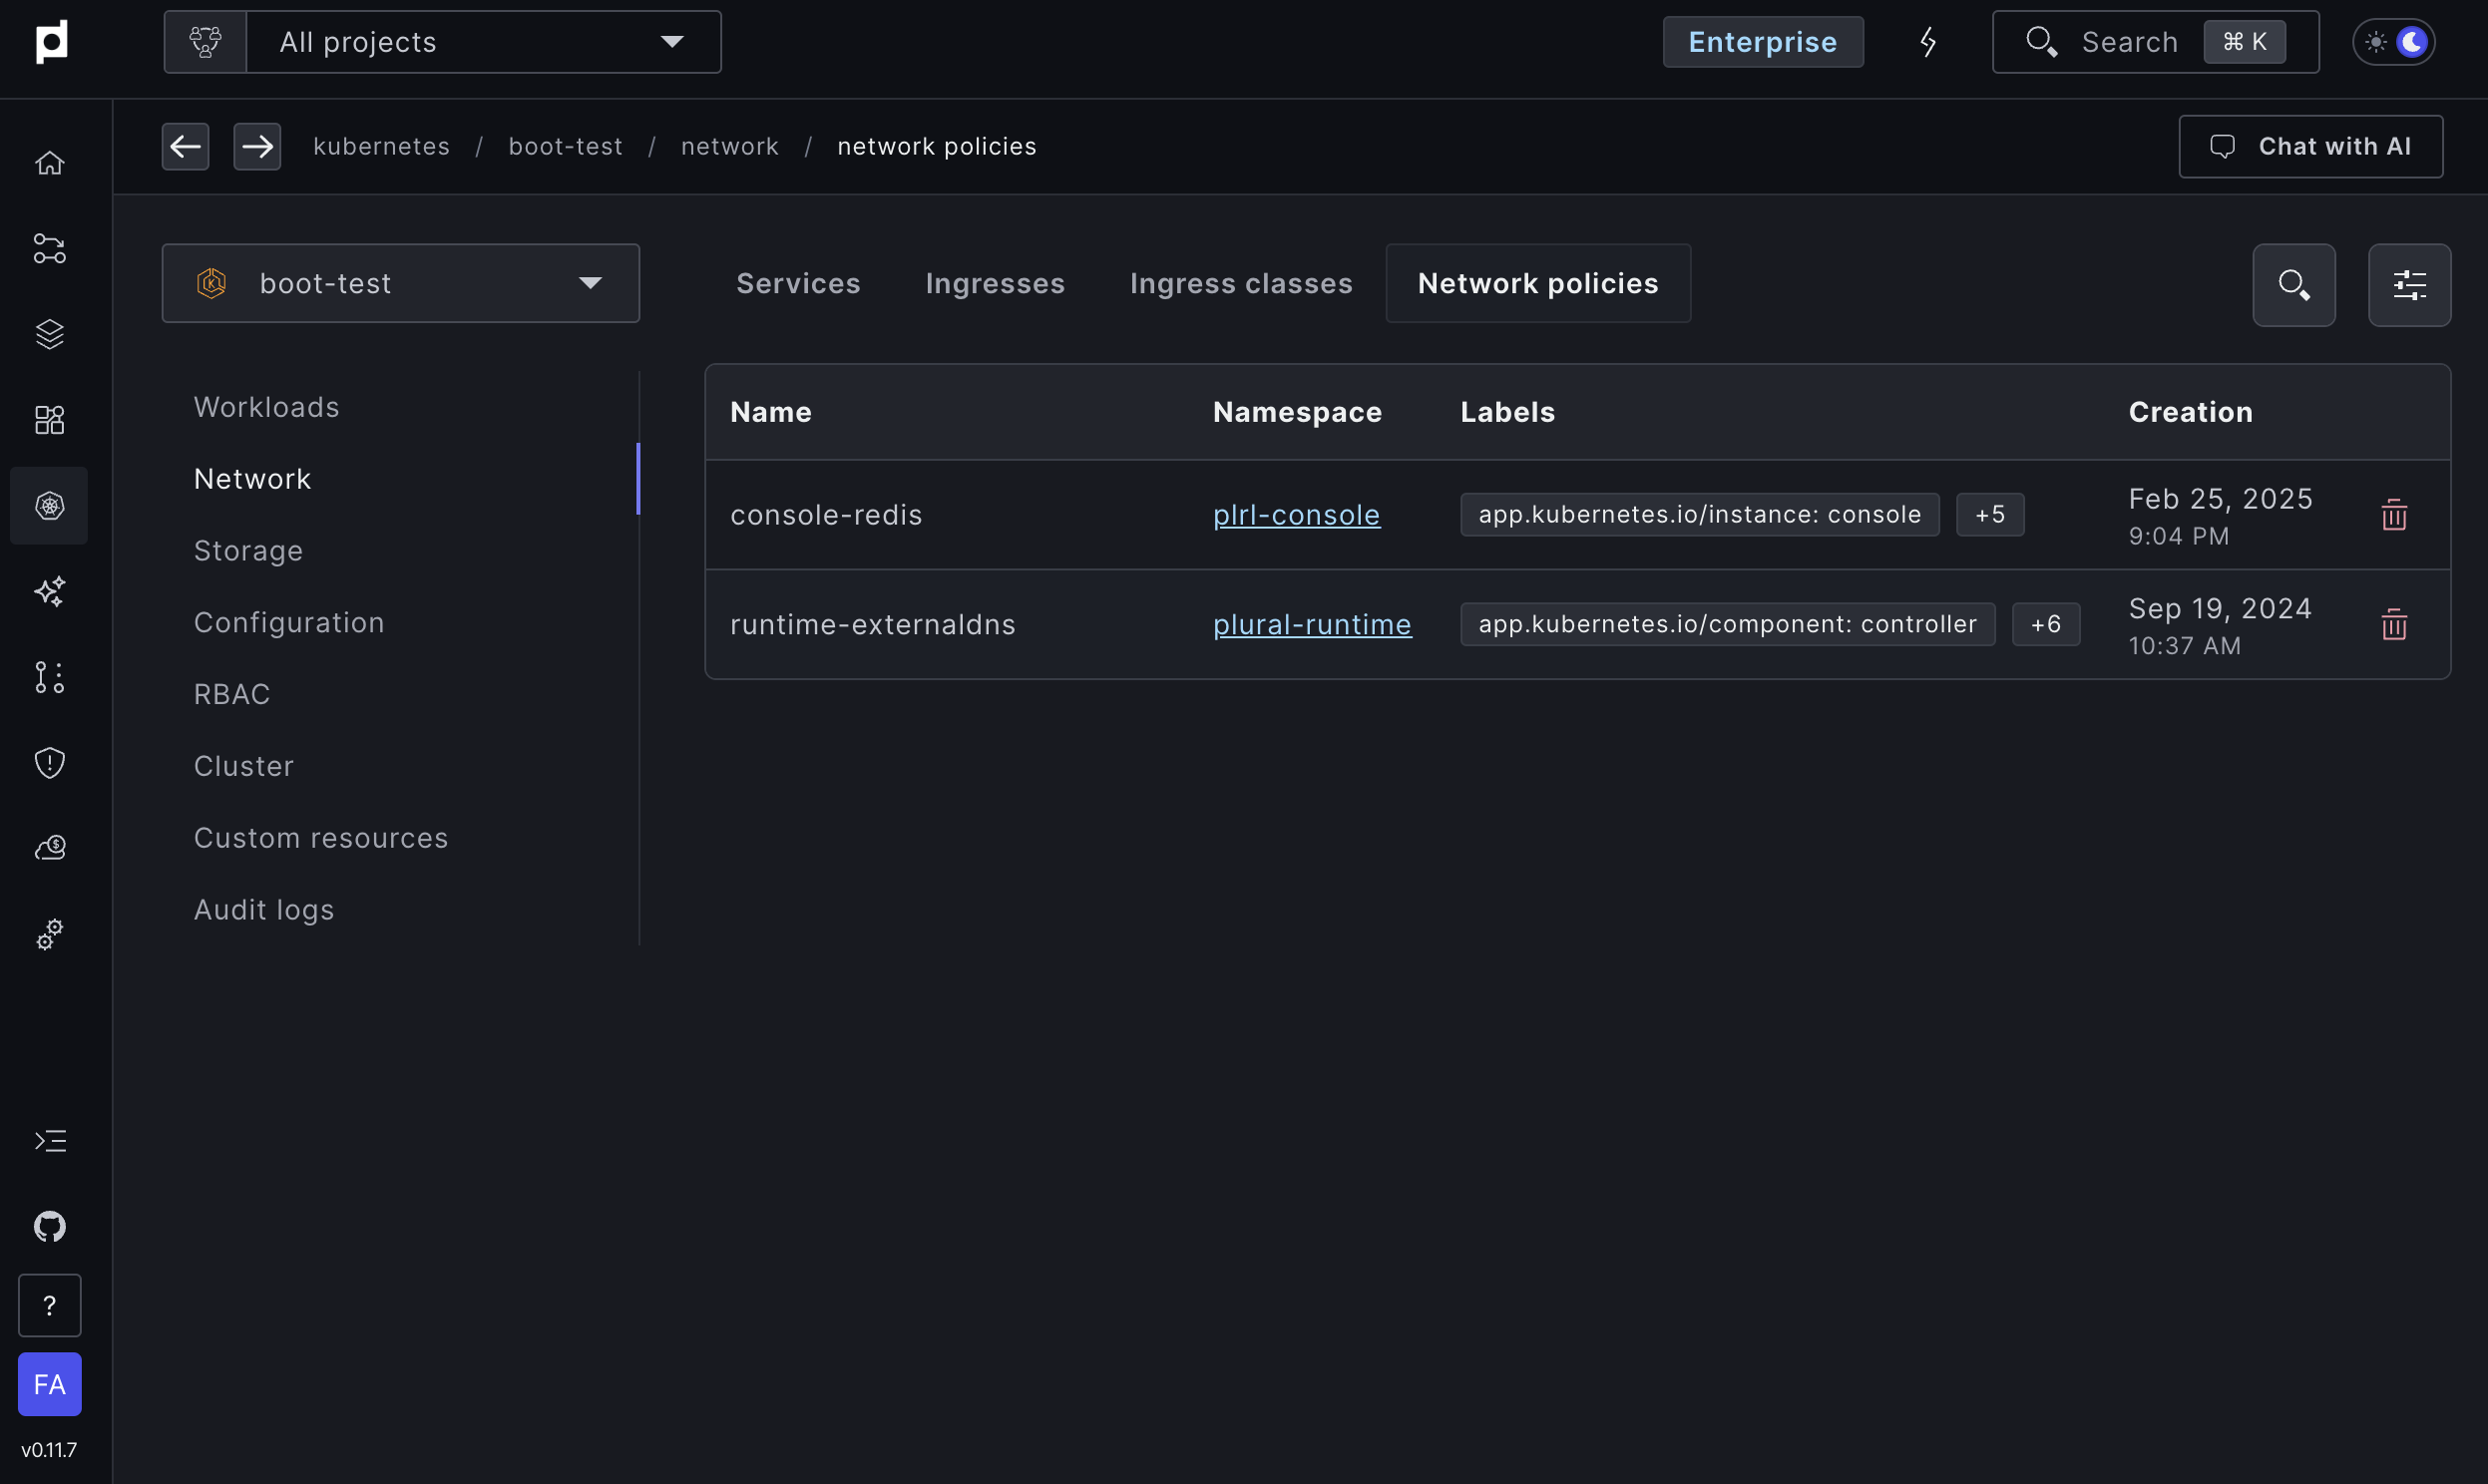
Integrating NetworkPolicy management into your broader Kubernetes management platform streamlines operations and improves visibility. This is where platforms like Plural step in, offering centralized solutions to streamline policy management from enforcing to monitoring network policies across your entire cluster. Plural ensures consistency across your entire cluster estate and prevents misconfiguration.

Compliance and Auditing
Network policies are essential for enhancing security and achieving compliance in regulated environments. For industries such as healthcare, finance, and insurance, maintaining adherence to standards like HIPAA, GDPR, and PCI DSS is crucial to avoid penalties and data breaches. Plural leverages extensive industry experience to assist organizations in meeting these requirements through centralized policy management. The platform ensures consistency across Kubernetes environments, preventing misconfigurations through policy automation with OPA Gatekeeper, while providing real-time auditing with logs and alerts for non-compliant actions.

Plural's comprehensive security approach extends to vulnerability management and data protection. The platform offers centralized CVE visibility through Trivy-powered image scanning across clusters, streamlined patching processes, and proactive alerts to reduce mitigation time.

Its secure-by-design architecture includes egress-only networking to minimize external access to critical systems, integrated RBAC and SSO for access management, and centralized SBOM management for software supply chain integrity. These features create a clear audit trail of allowed and denied traffic, simplifying security incident investigations while strengthening your overall security posture through a layered approach.

Related Articles
- Deep Dive into Kubernetes Service Types
- Kubernetes Adoption: Use Cases & Best Practices
- Kubernetes Terminology: A 2023 Guide
- Kubernetes Service Discovery: What You Must Know
Unified Cloud Orchestration for Kubernetes
Manage Kubernetes at scale through a single, enterprise-ready platform.
Frequently Asked Questions
Why should I use Network Policies if Kubernetes already has Services and Ingress?
Services and Ingress manage external access to your cluster, while Network Policies control traffic within the cluster. Think of Ingress as your front door and Network Policies as internal walls. They complement each other to provide comprehensive security.
How do I choose between using labels, namespaces, or IP blocks for my Network Policy selectors?
Labels offer the most granular control, allowing you to target specific pods based on their function. Namespaces are helpful for broader segmentation, applying policies to all pods within a particular environment like production or staging. IP blocks are best for managing traffic from external sources or specific IP ranges. Often, a combination of these selectors is the most effective approach.
What happens if multiple Network Policies apply to the same pod?
Network Policies are additive. If multiple policies select the same pod, the allowed traffic is the combination of what's permitted by all applicable policies. However, for a connection to be established, both the sending pod's egress policy and the receiving pod's ingress policy must allow the connection.
How can I ensure my Network Policies don't accidentally block legitimate traffic?
Thorough testing is crucial. Start by using kubectl apply --dry-run=client to validate your YAML. Deploy your policies to a staging environment first to observe their impact on real-world traffic. Start with a deny-all policy in staging and incrementally add allow rules to ensure you're not inadvertently blocking essential communication.
What's the best way to manage Network Policies in a large cluster?
Integrating NetworkPolicy management into your broader Kubernetes management platform streamlines operations and improves visibility. Platforms like Plural offer centralized solutions to streamline policy management from enforcing to monitoring network policies across your entire cluster. Plural ensures consistency across your entire cluster estate and prevents misconfiguration.
Newsletter
Join the newsletter to receive the latest updates in your inbox.


